Stores and Zones
Overview
Section titled “Overview”Stores represent the physical retail or operational locations connected to Transpeye. Every transaction, alert, camera, till, and operator in the system is associated with a store. Zones are subdivisions within a store — for example, a specific area of the shop floor or a back-office section — used for more granular event mapping in access control and camera analytics. Both stores and zones are managed under Setup in the navigation bar and require setup-level user permissions to access.
Step-by-Step Guide
Section titled “Step-by-Step Guide”Step 1: Open the Stores Page
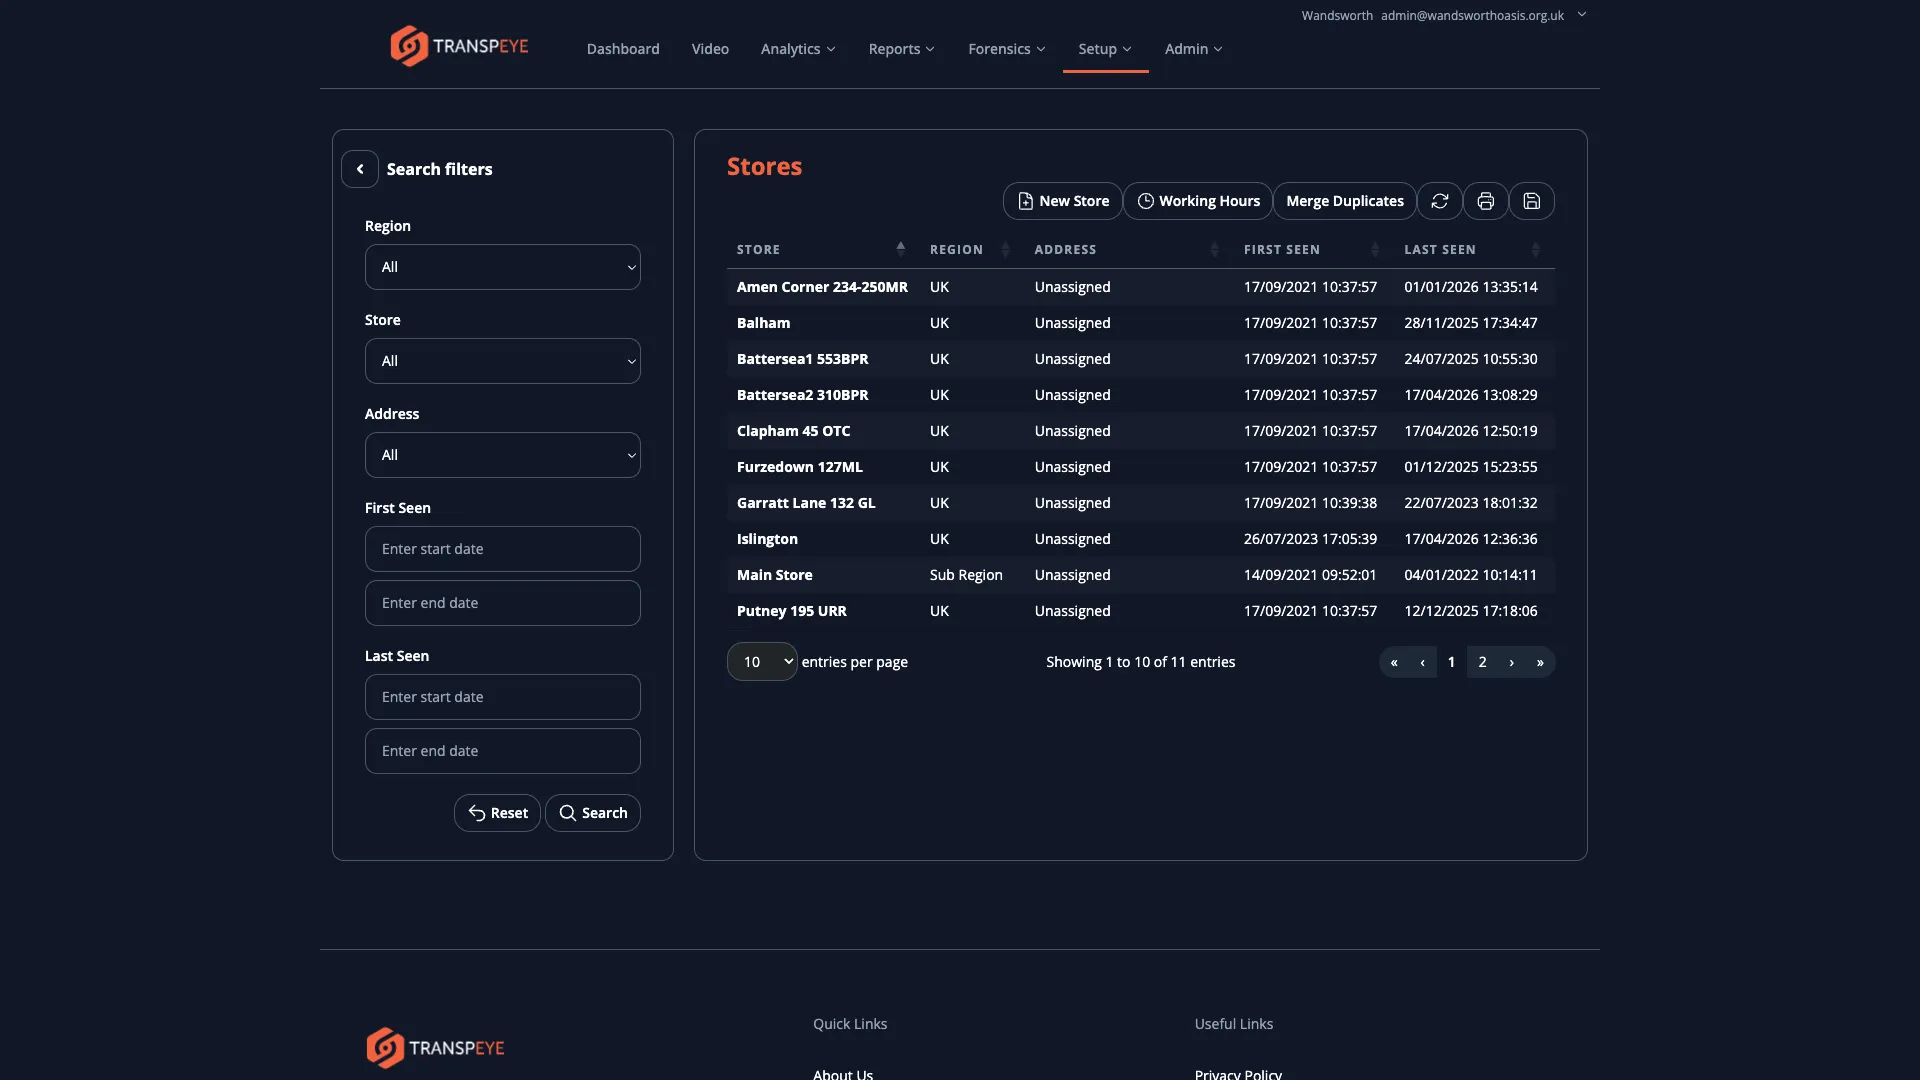
Section titled “Step 1: Open the Stores Page”In the navigation bar, click Setup, then click Stores. The stores table at /stores loads, showing all stores configured for your account.
Step 2: Understand the Stores Table
Section titled “Step 2: Understand the Stores Table”The stores table contains the following columns:
| Column | Description |
|---|---|
| Name | The display name of the store as it appears throughout Transpeye |
| Address | The physical address of the store |
| Region | The region (and sub-region, if applicable) to which the store belongs in the regional hierarchy |
The stores table is read-only for standard users. Partner and administrator users can add and edit store records through the partner account management tools.
Step 3: View Store Details
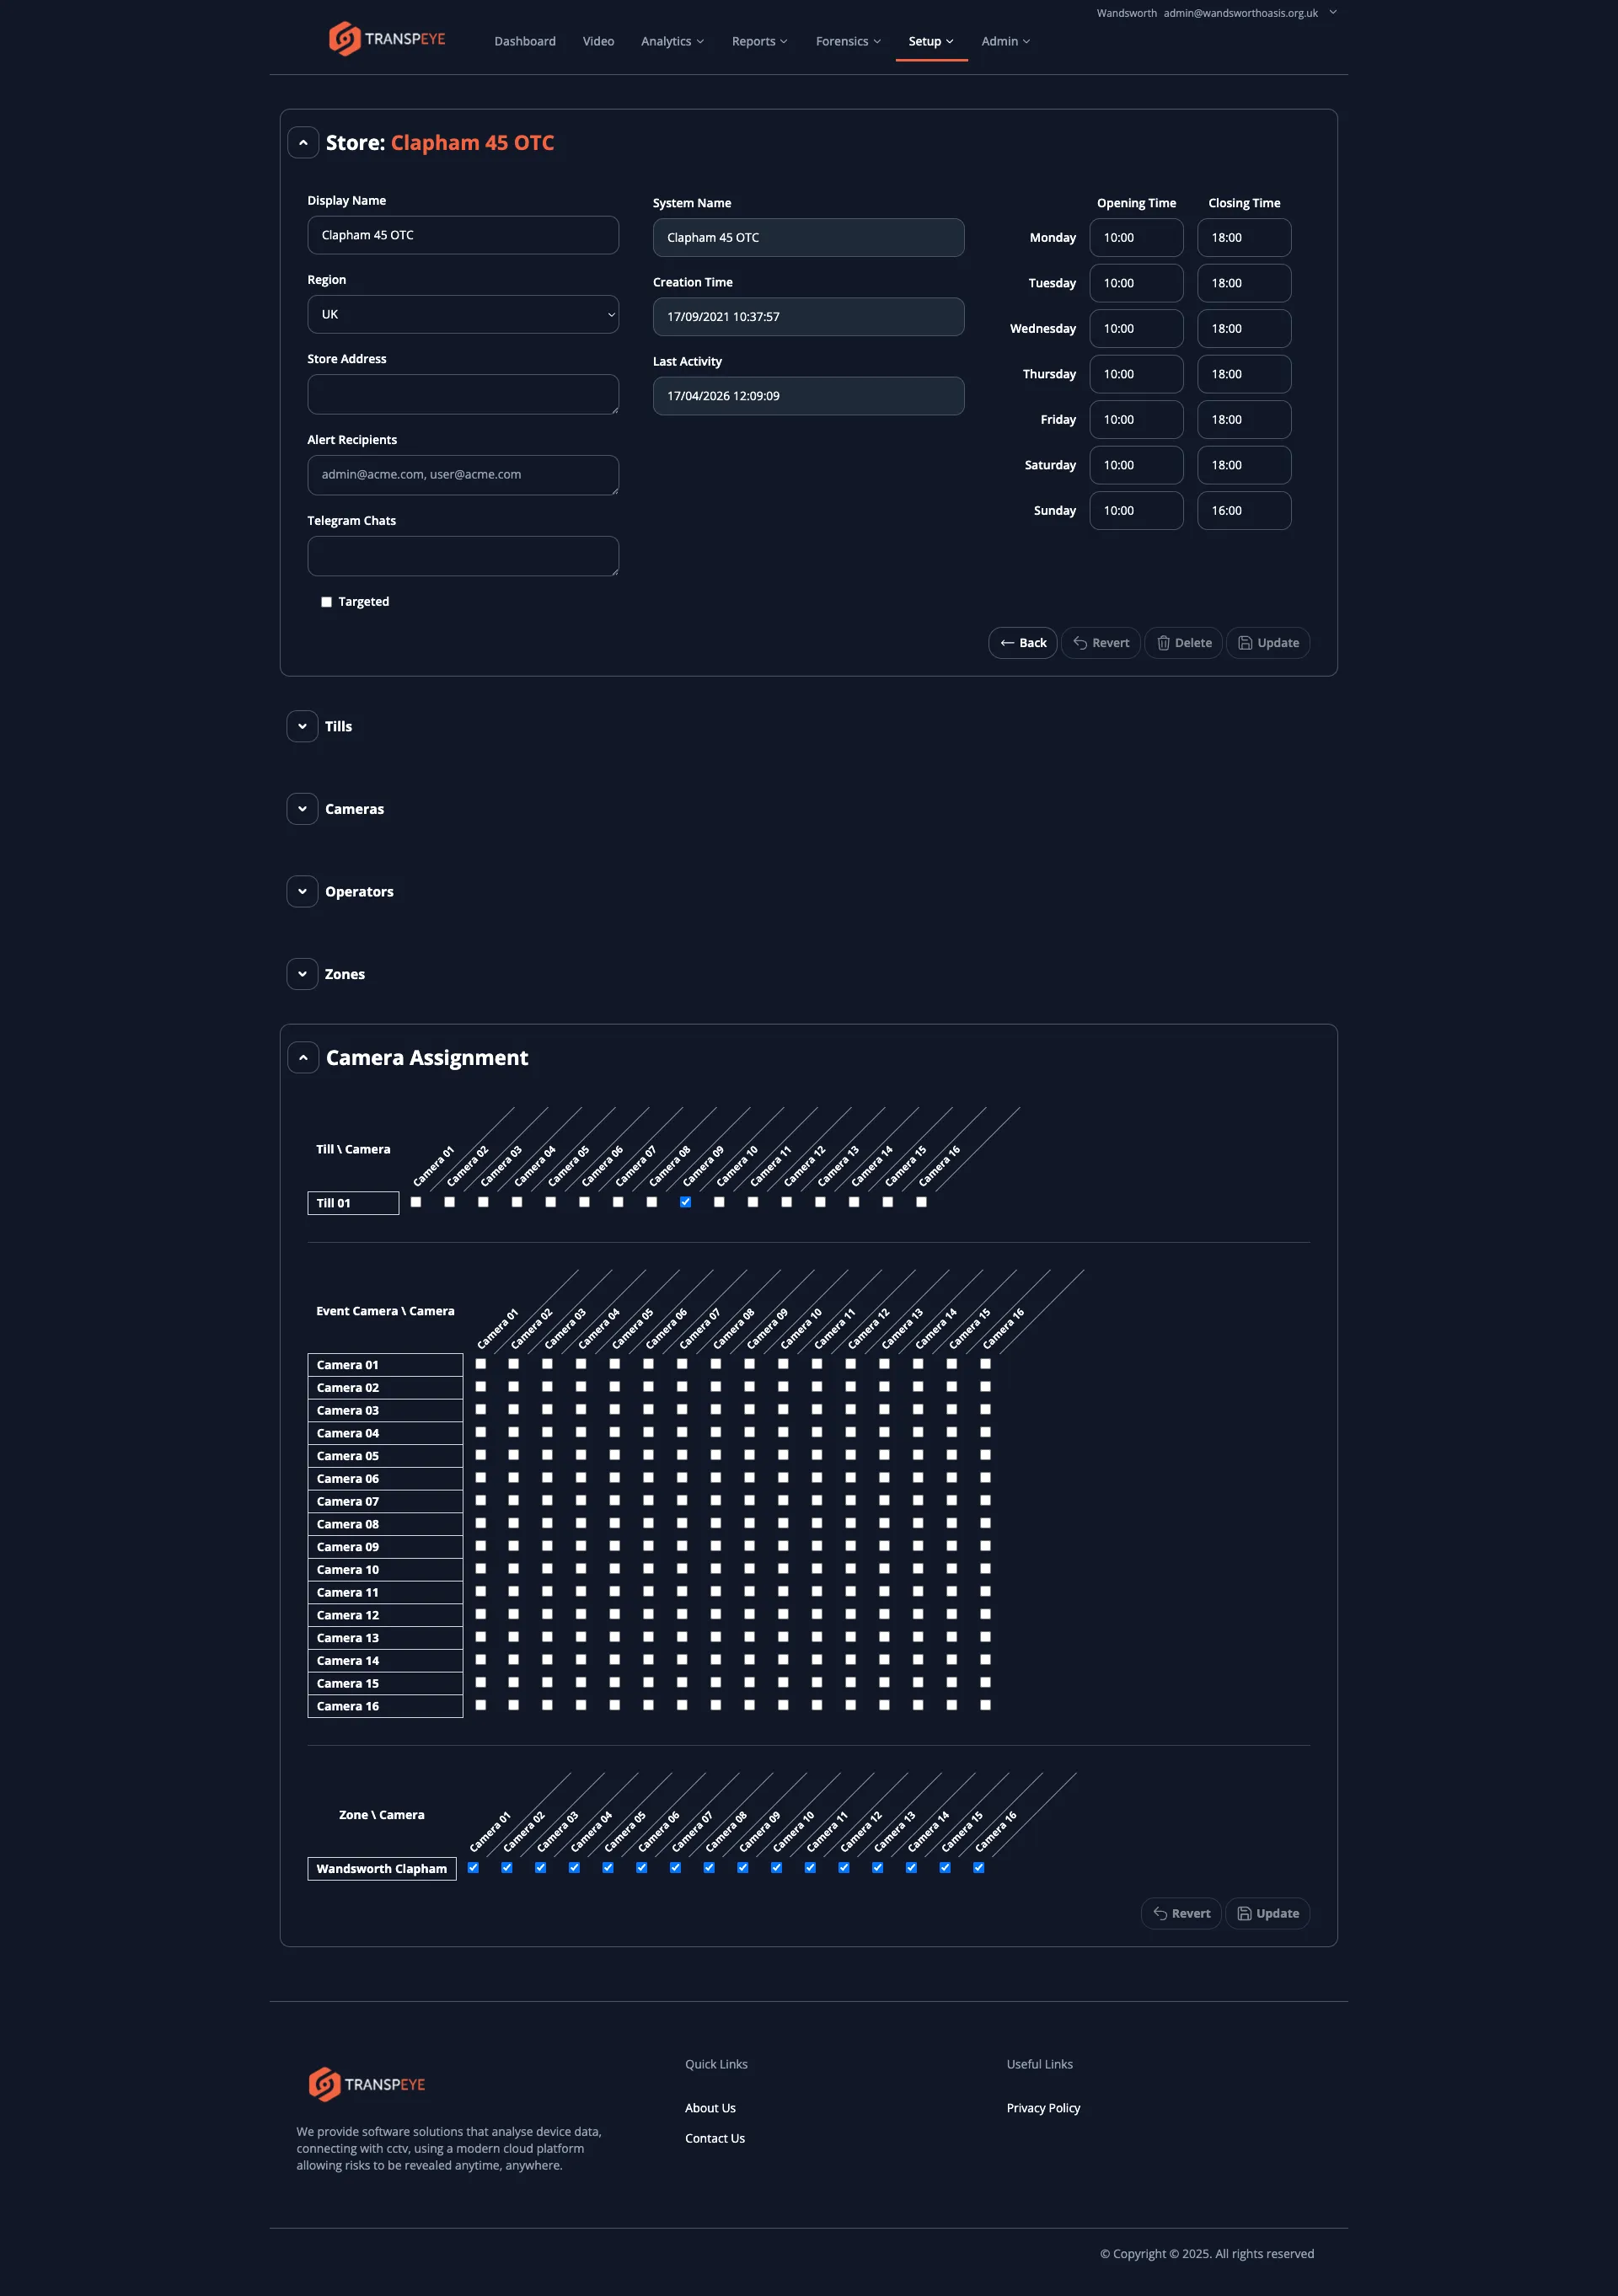
Section titled “Step 3: View Store Details”Click any store row to open the Store Detail view. The detail view shows:
- The full store name and address
- The region and sub-region assignment
- A list of tills registered at the store
- A list of cameras installed at the store
- A list of agents deployed at the store
- Any working hours (opening times) configured for the store, which are used by out-of-hours policies
- A Hero Risk Scorecard, if Hero Alerts are enabled for your account
The store detail view is informational. It allows you to quickly confirm what devices and operators are associated with a given location when investigating an alert. When Hero Alerts are enabled, the store detail view can also show a Hero Risk Scorecard summarising the store’s latest risk categories, severity, peer comparison, and trend.
Step 4: Review the Regional Hierarchy
Section titled “Step 4: Review the Regional Hierarchy”Stores are grouped within a regional hierarchy. The hierarchy is:
Region > Sub-region (optional) > Store
The regional structure is used throughout Transpeye for filtering in analytics, reports, and forensics views. Understanding which stores belong to which region helps you apply filters effectively when reviewing data.
To see the full regional hierarchy, navigate to Setup > Regions in the navigation bar.
Step 5: Open the Zones Page
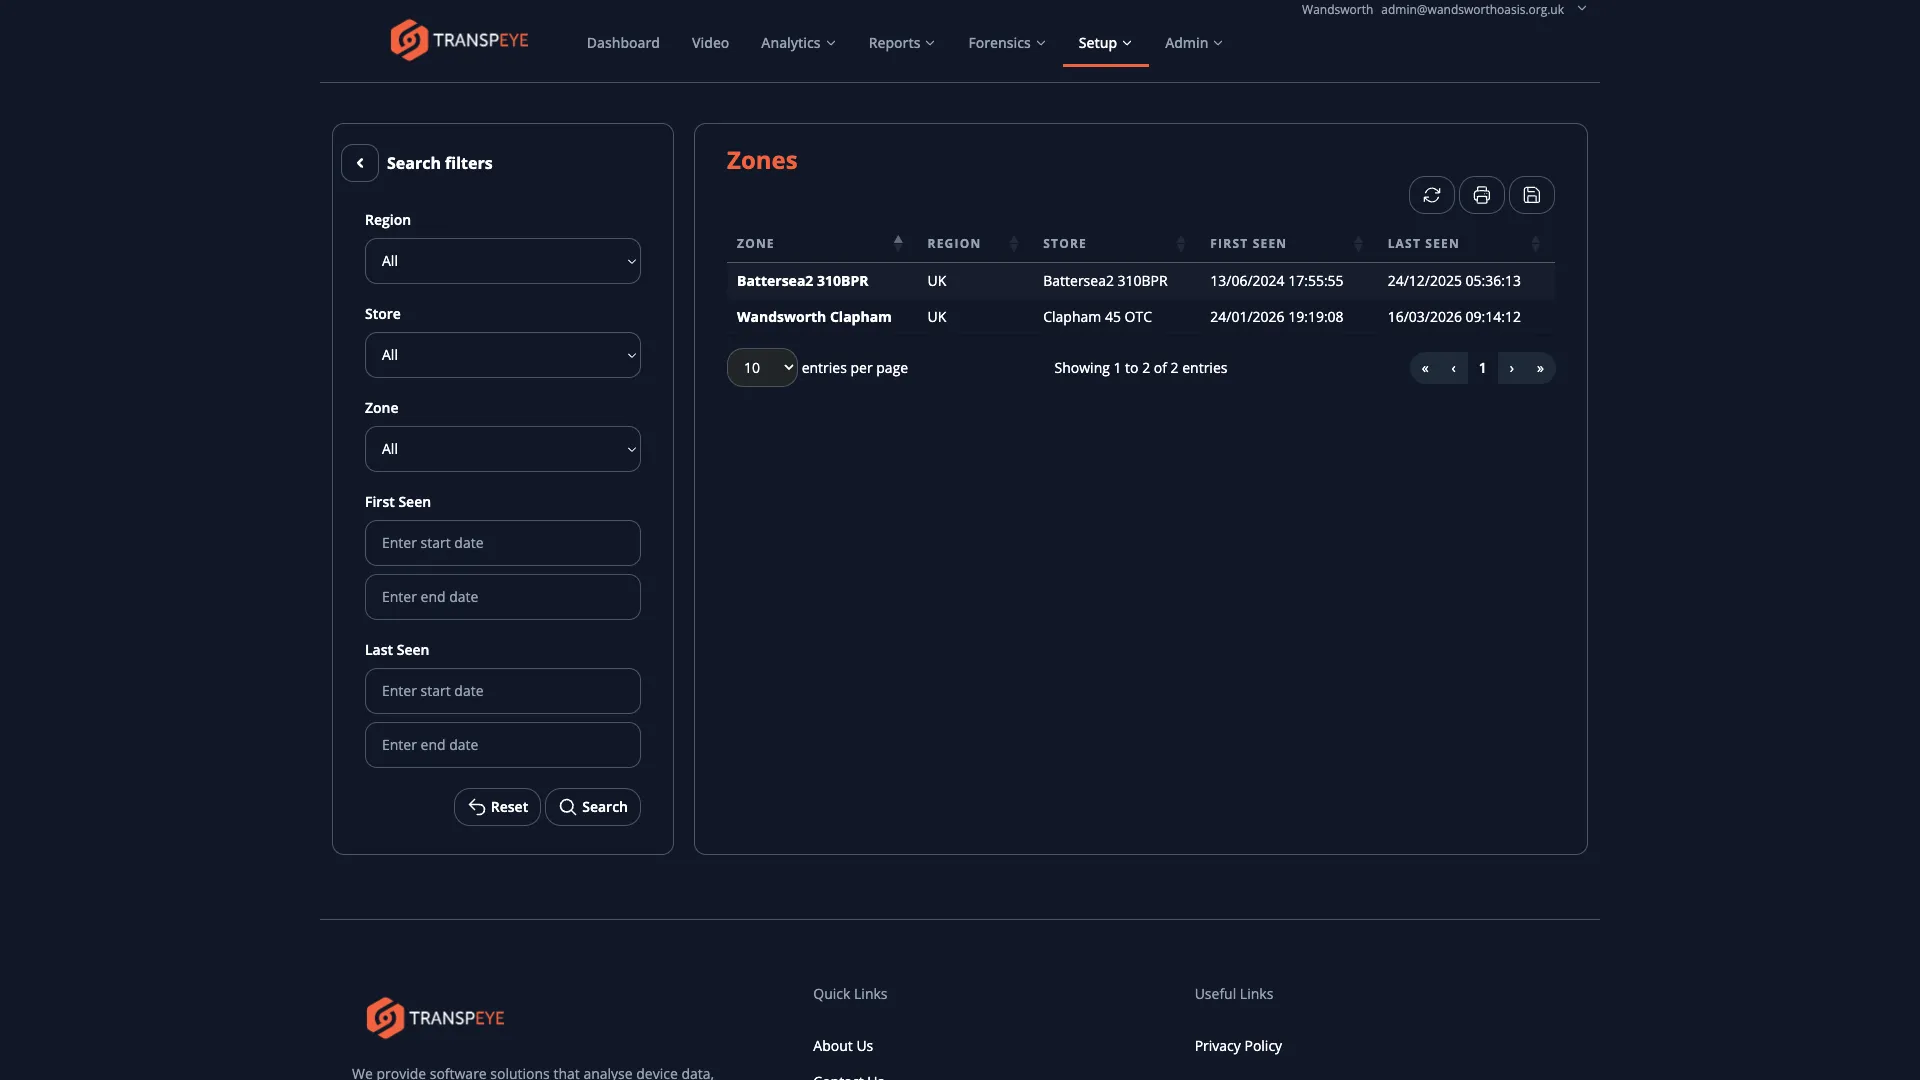
Section titled “Step 5: Open the Zones Page”In the navigation bar, click Setup, then click Zones. The zones table at /zones loads, showing all zones configured across your account.
Step 6: Understand the Zones Table
Section titled “Step 6: Understand the Zones Table”The zones table contains the following columns:
| Column | Description |
|---|---|
| Zone Name | The name of the zone within the store |
| Store | The store to which the zone belongs |
Zones are used primarily to link access control events and camera coverage areas to specific parts of a store. For example, a zone named “Stock Room” within a store called “Manchester North” would allow access control events at the stock room door to be filtered separately from events at the main store entrance.
Step 7: View Zone Details
Section titled “Step 7: View Zone Details”Click any zone row to open the Zone Detail view. The detail view shows the zone name, the parent store, and any devices or access points associated with the zone.
- Store names appear across all views. The store name set in the store record is the name that appears in the Alerts table, Transactions table, dashboard panels, analytics charts, and reports. Use clear, consistent naming conventions when stores are first set up to ensure readability across all views.
- Out-of-hours policies depend on store working hours. If your account uses out-of-hours transaction policies, the working hours configured on each store record determine what counts as “outside hours”. If alerts are firing at unexpected times, check the working hours configuration on the relevant store by opening the store detail view.
- Use regions to organise analytics. The Drilldown, Quadrant, and Hotspot analytics views all use the regional hierarchy to group data. A well-structured regional hierarchy makes these views much more useful for multi-site estates.
- Zones improve access control reporting. If your sites use access control hardware, configuring zones allows you to filter access control events by specific areas of a store, making it much easier to investigate events at a particular entry point.
Troubleshooting
Section titled “Troubleshooting”| Problem | Solution |
|---|---|
| A store does not appear in the stores list | The store may belong to a different account, or it may not yet have been configured. Contact your administrator or partner to add the store. |
| A store shows incorrect working hours | Working hours are configured in the store detail view. Contact an administrator or setup user to correct the hours. Incorrect working hours can cause out-of-hours policies to fire unexpectedly. |
| Zones are not visible in the access control events | Zones must be linked to specific access control devices during the site setup. If a zone is not appearing in events, contact your administrator to confirm the device-to-zone mapping. |
| The Stores page is not accessible | Your user role does not include setup permissions. Contact your administrator. |
| A store appears in alerts but not in the Stores list | This can occur if a store was deleted from the configuration but historical alert data referencing it still exists. Contact your administrator. |