Viewing Transactions
Overview
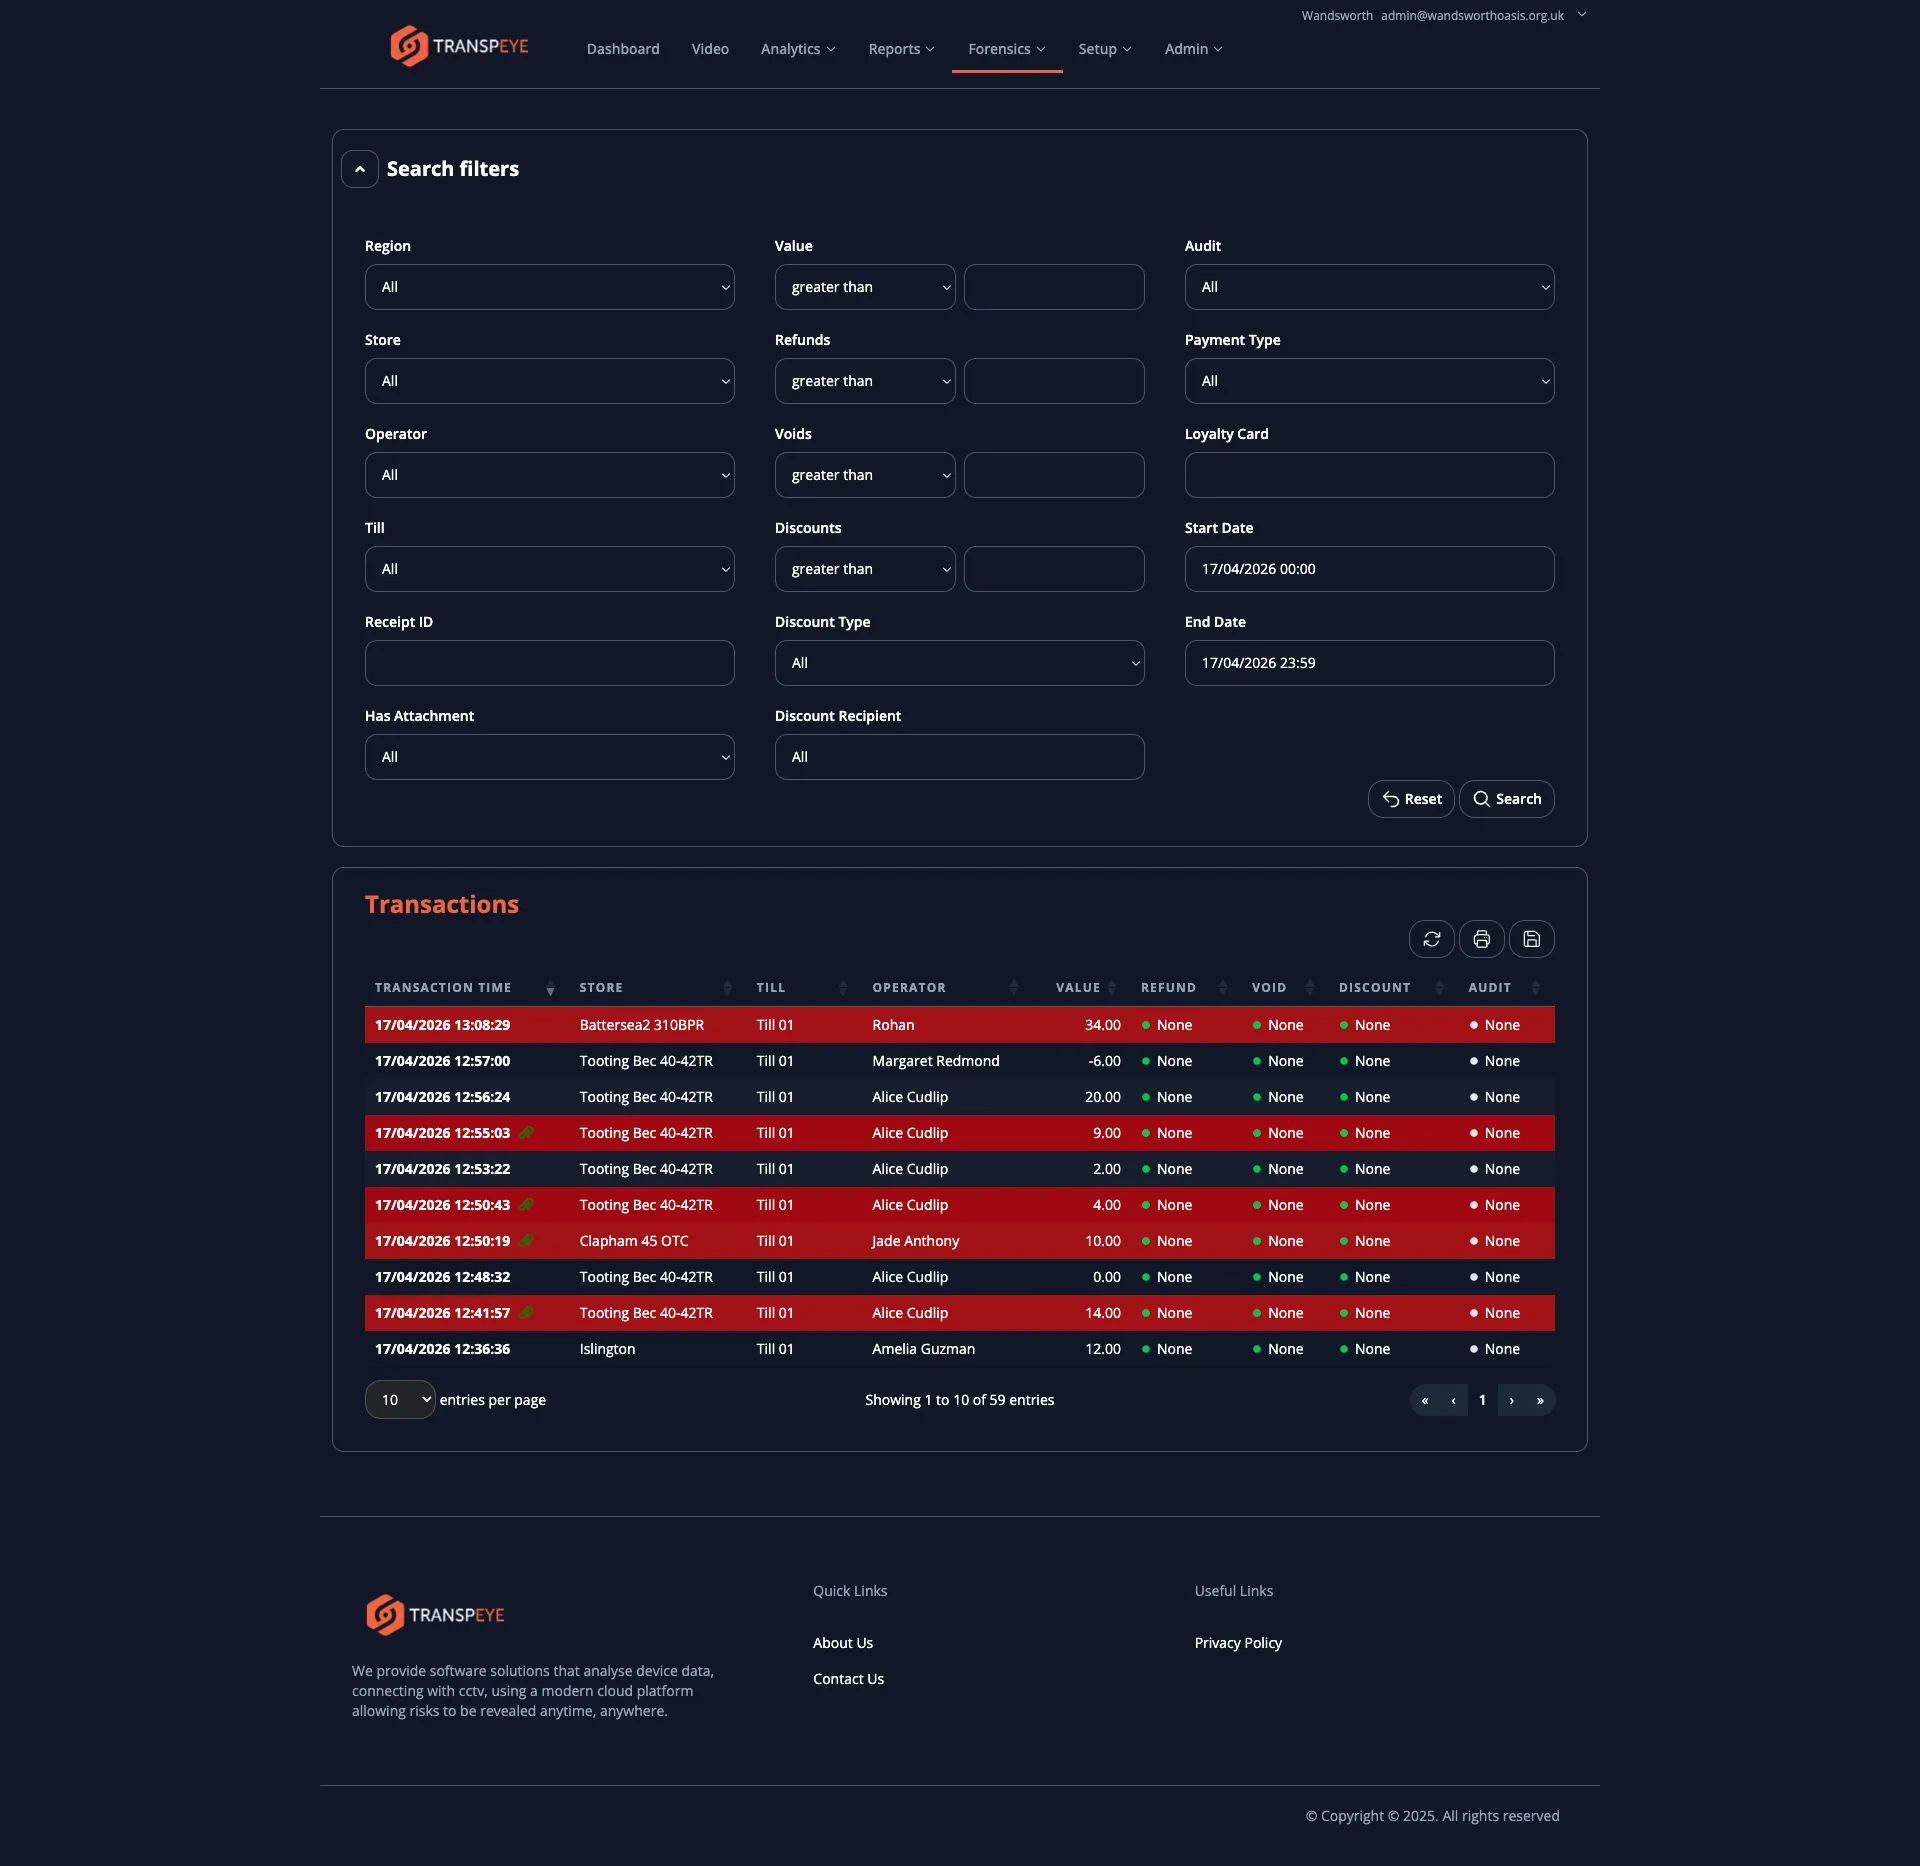
Section titled “Overview”The Transactions page at /table displays a complete record of every transaction received from your point-of-sale systems. You can use it to investigate individual sales, search across your estate by date, store, operator, or value, and identify transactions that have triggered policy violations. Each transaction row links to a detailed leaf view showing full line item breakdown, attached CCTV footage, screenshots, and audit history.
Step-by-Step Guide
Section titled “Step-by-Step Guide”Step 1: Open the Transactions Page
Section titled “Step 1: Open the Transactions Page”In the navigation bar, click Forensics, then click Transactions. The transactions table loads, pre-filtered to show the last seven days of data for your account.
Step 2: Understand the Table Columns
Section titled “Step 2: Understand the Table Columns”The transactions table contains the following columns:
| Column | Description |
|---|---|
| Transaction Time | The date and time the transaction occurred at the till |
| Store | The store where the transaction was recorded |
| Till | The till (point-of-sale terminal) that processed the transaction |
| Operator | The operator (staff member) logged in when the transaction occurred |
| Value | The total value of the transaction |
| Refund | The refund amount applied within this transaction, if any |
| Void | The void amount applied within this transaction, if any |
| Discount | The total discount applied within this transaction, if any |
| Audit | The current audit status of the transaction, if an audit has been assigned by a policy |
Step 3: Apply Search Filters
Section titled “Step 3: Apply Search Filters”Above the table is the Search Filters panel. Use these controls to narrow the results:
| Filter | How to use it |
|---|---|
| Start Date / End Date | Click the date fields to open a calendar picker and select your desired date and time range |
| Region | Select a region to show only transactions from stores in that region |
| Store | Select a specific store |
| Operator | Select a specific operator |
| Till | Select a specific till |
| Value | Enter a numeric value and choose a comparison operator (greater than, equals, or less than) to filter by transaction value |
| Discount | Filter by discount amount using the same comparison operators |
| Void | Filter by void amount |
| Refund | Filter by refund amount |
| Audit | Filter to show only transactions in a specific audit state |
| Has Attachment | Select Yes to show only transactions that have an associated screenshot or CCTV clip, or No to show those without |
| Payment Type | Filter by payment method (cash, card, voucher, etc.) |
| Discount Type | Filter by discount category (customer discount, staff discount) |
After setting your filters, click “Apply” to update the table. Click “Reset Filters” to return all filters to their default values and show the last seven days of data.
Step 4: Sort the Table
Section titled “Step 4: Sort the Table”Click any column header to sort the table by that column. The first click sorts in ascending order; clicking again sorts in descending order. An arrow indicator on the column header shows the current sort direction. The default sort is Transaction Time descending (most recent first).
Step 5: Open a Transaction Detail View
Section titled “Step 5: Open a Transaction Detail View”Click any row in the table to open the Transaction Detail view for that record. The detail view shows:
- Full transaction metadata (time, store, till, operator, receipt ID)
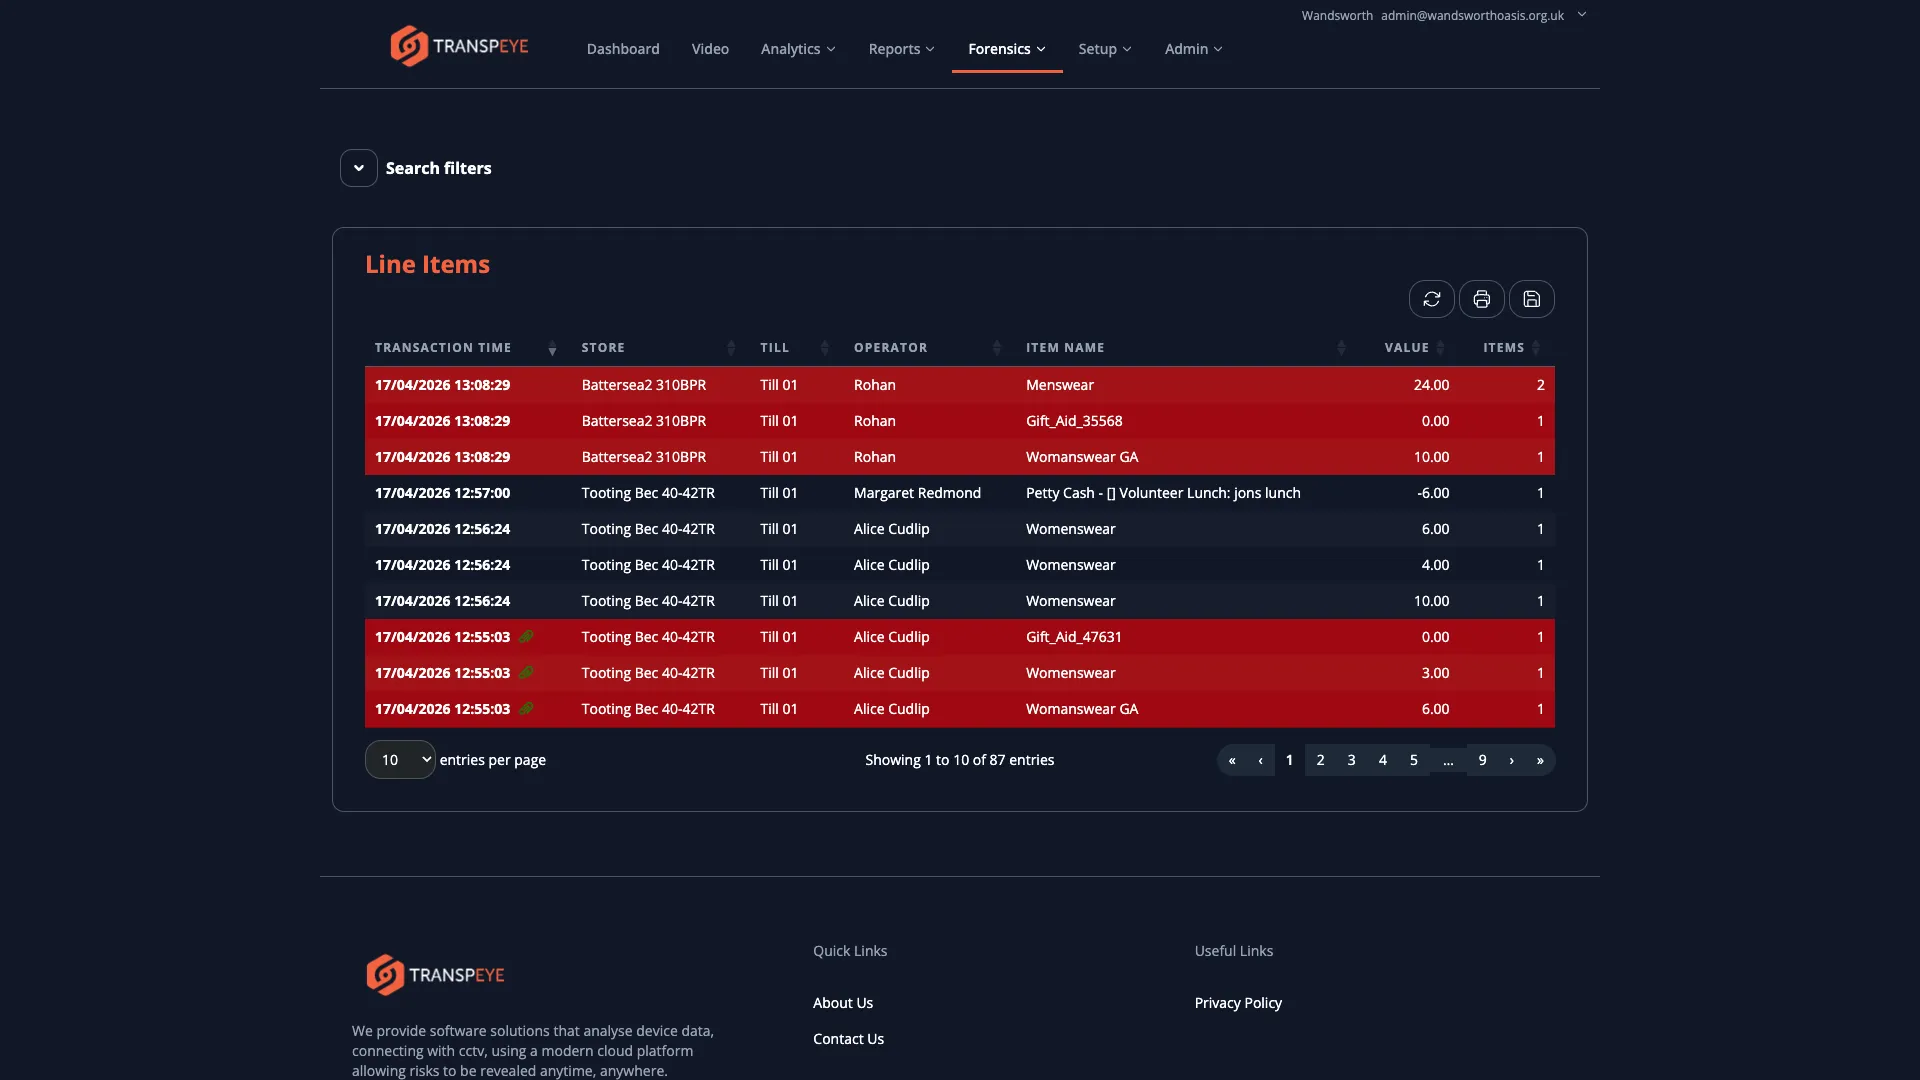
- A breakdown of all line items (see the Line Items view at
/itemsfor a dedicated table of all line items across transactions)
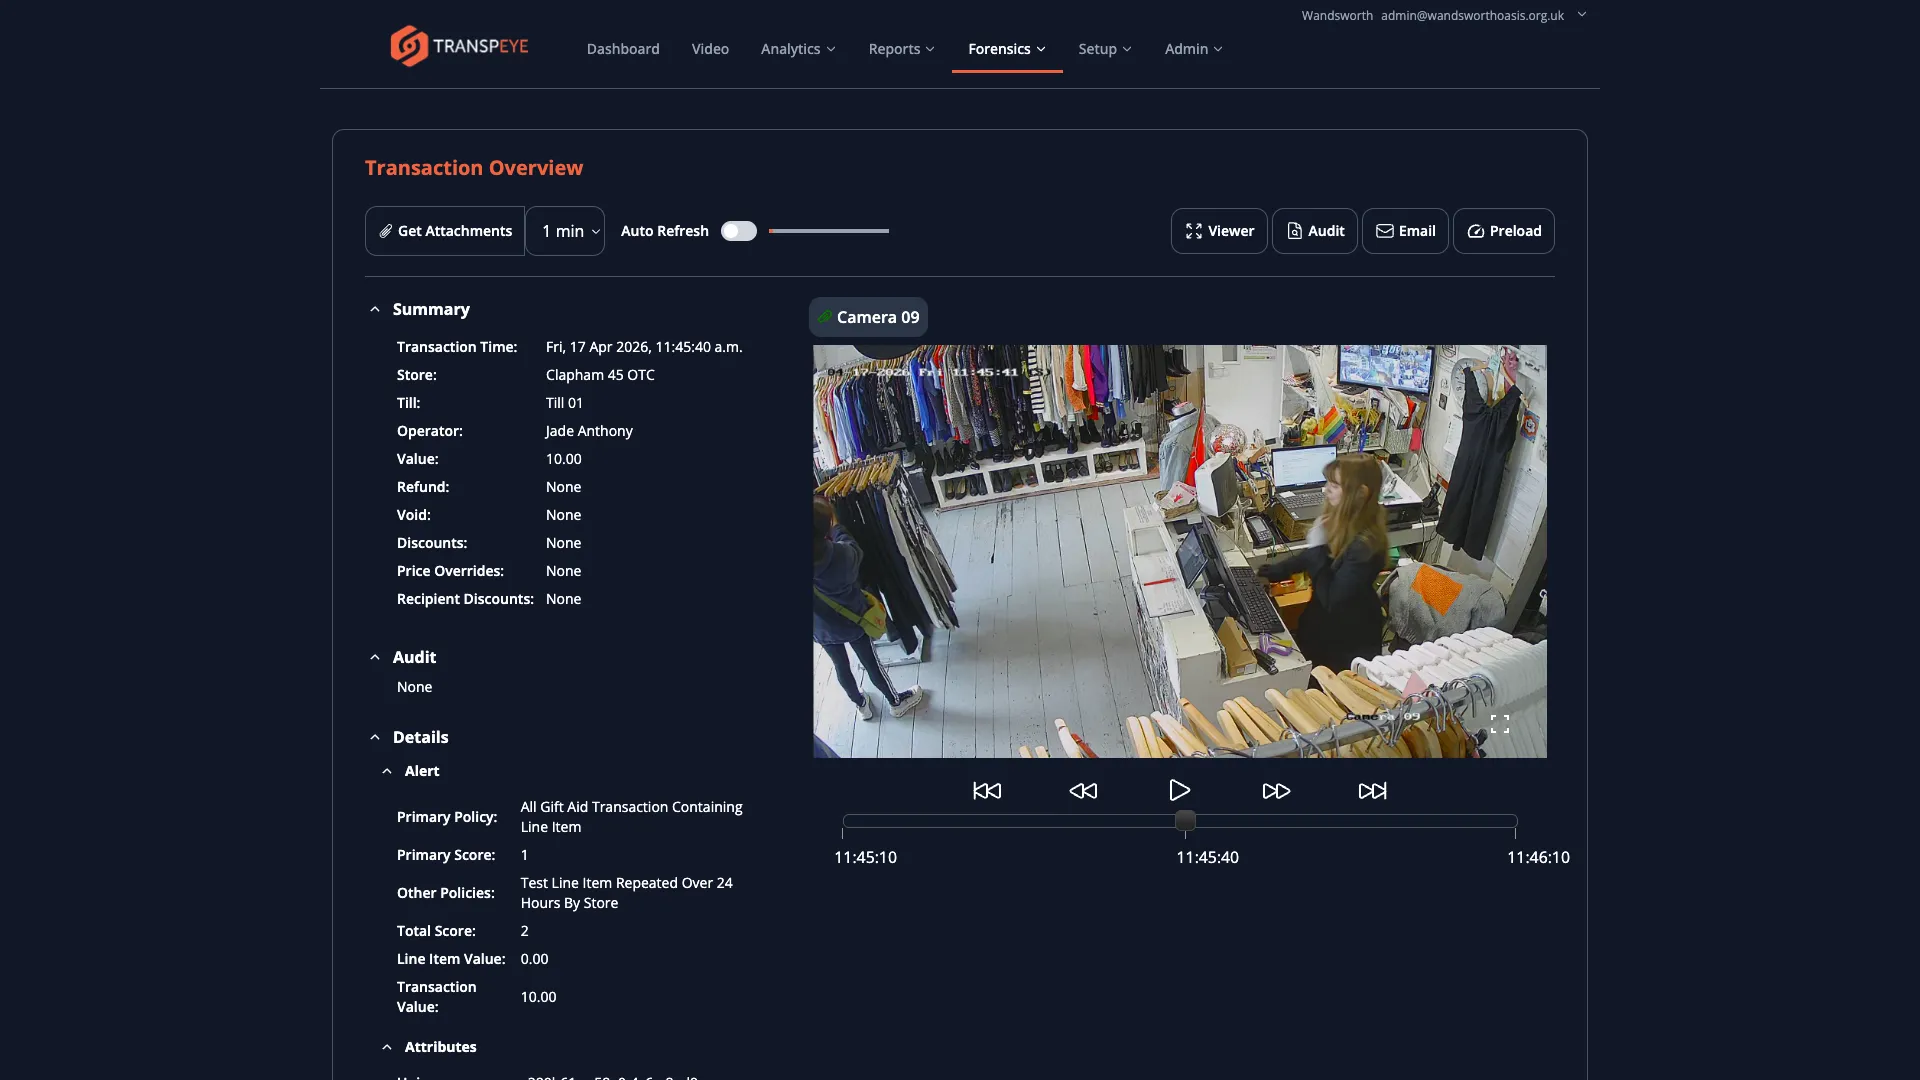
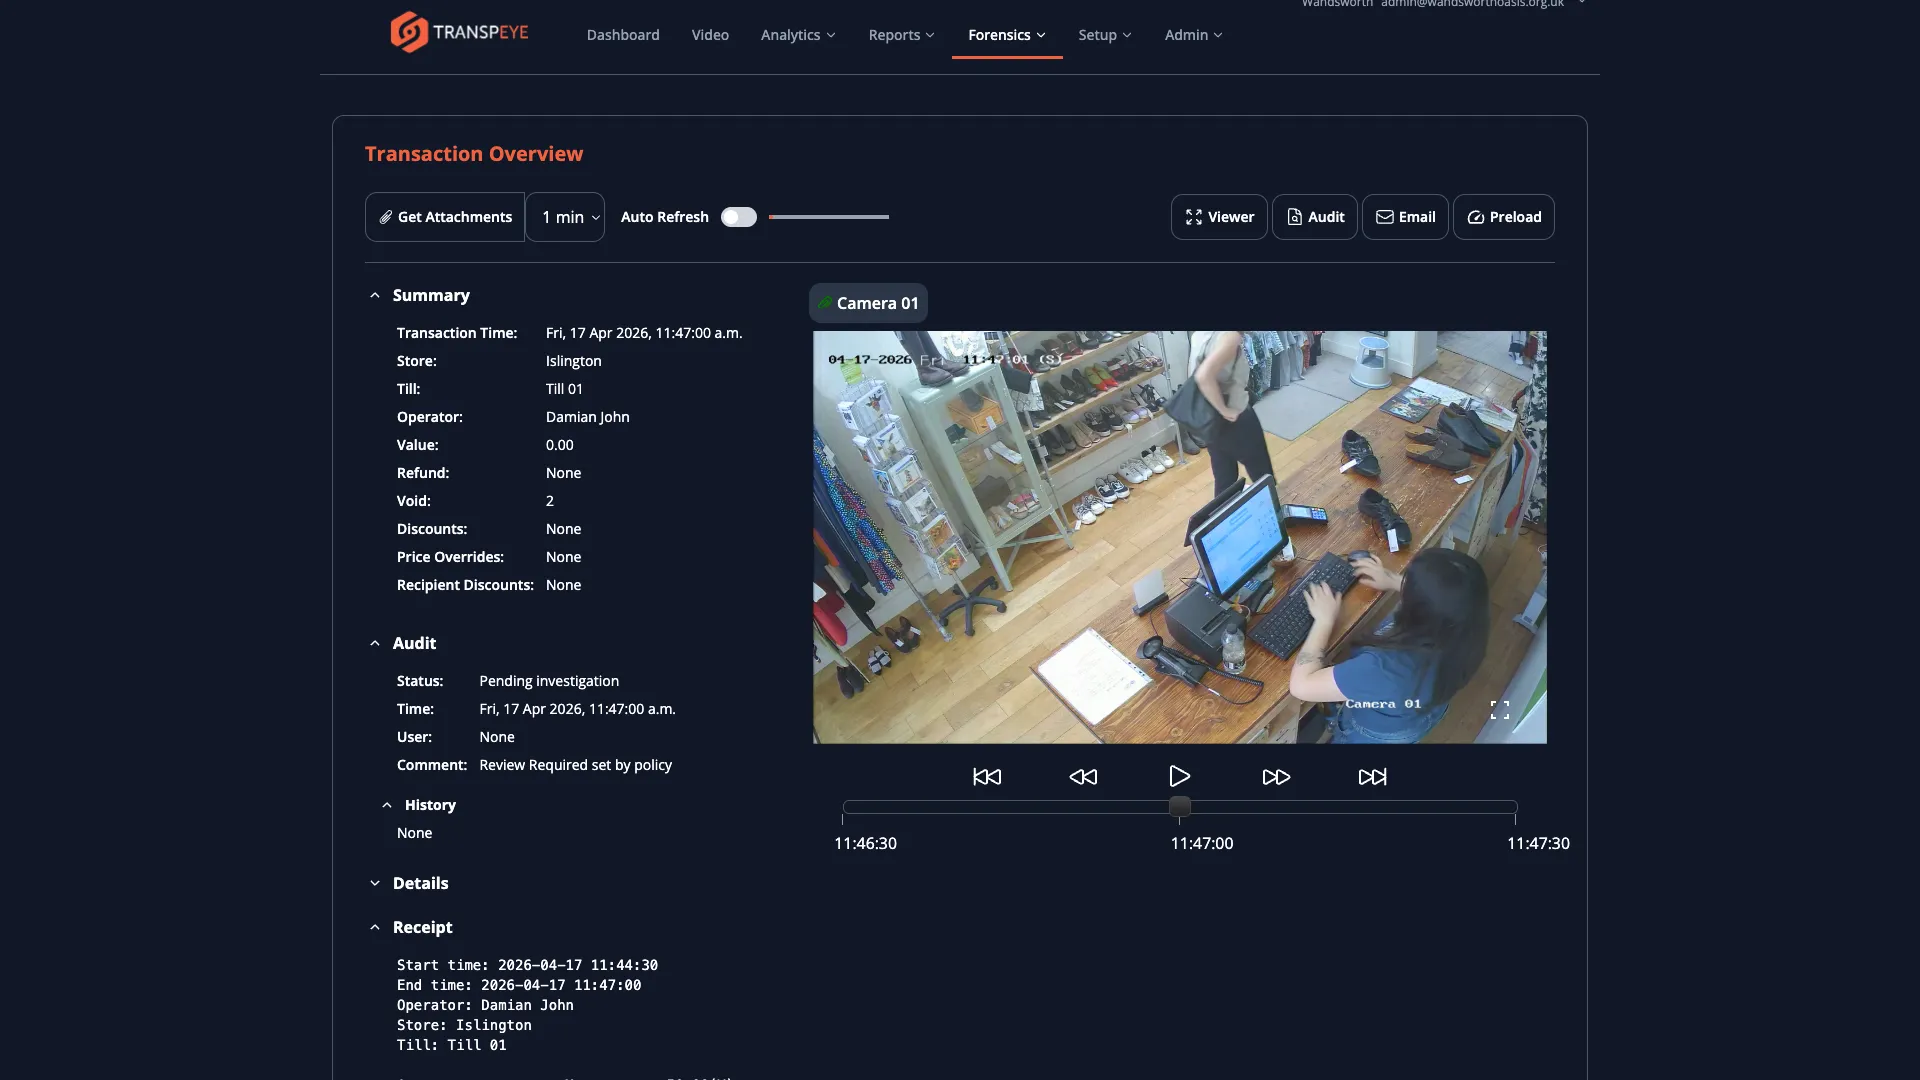
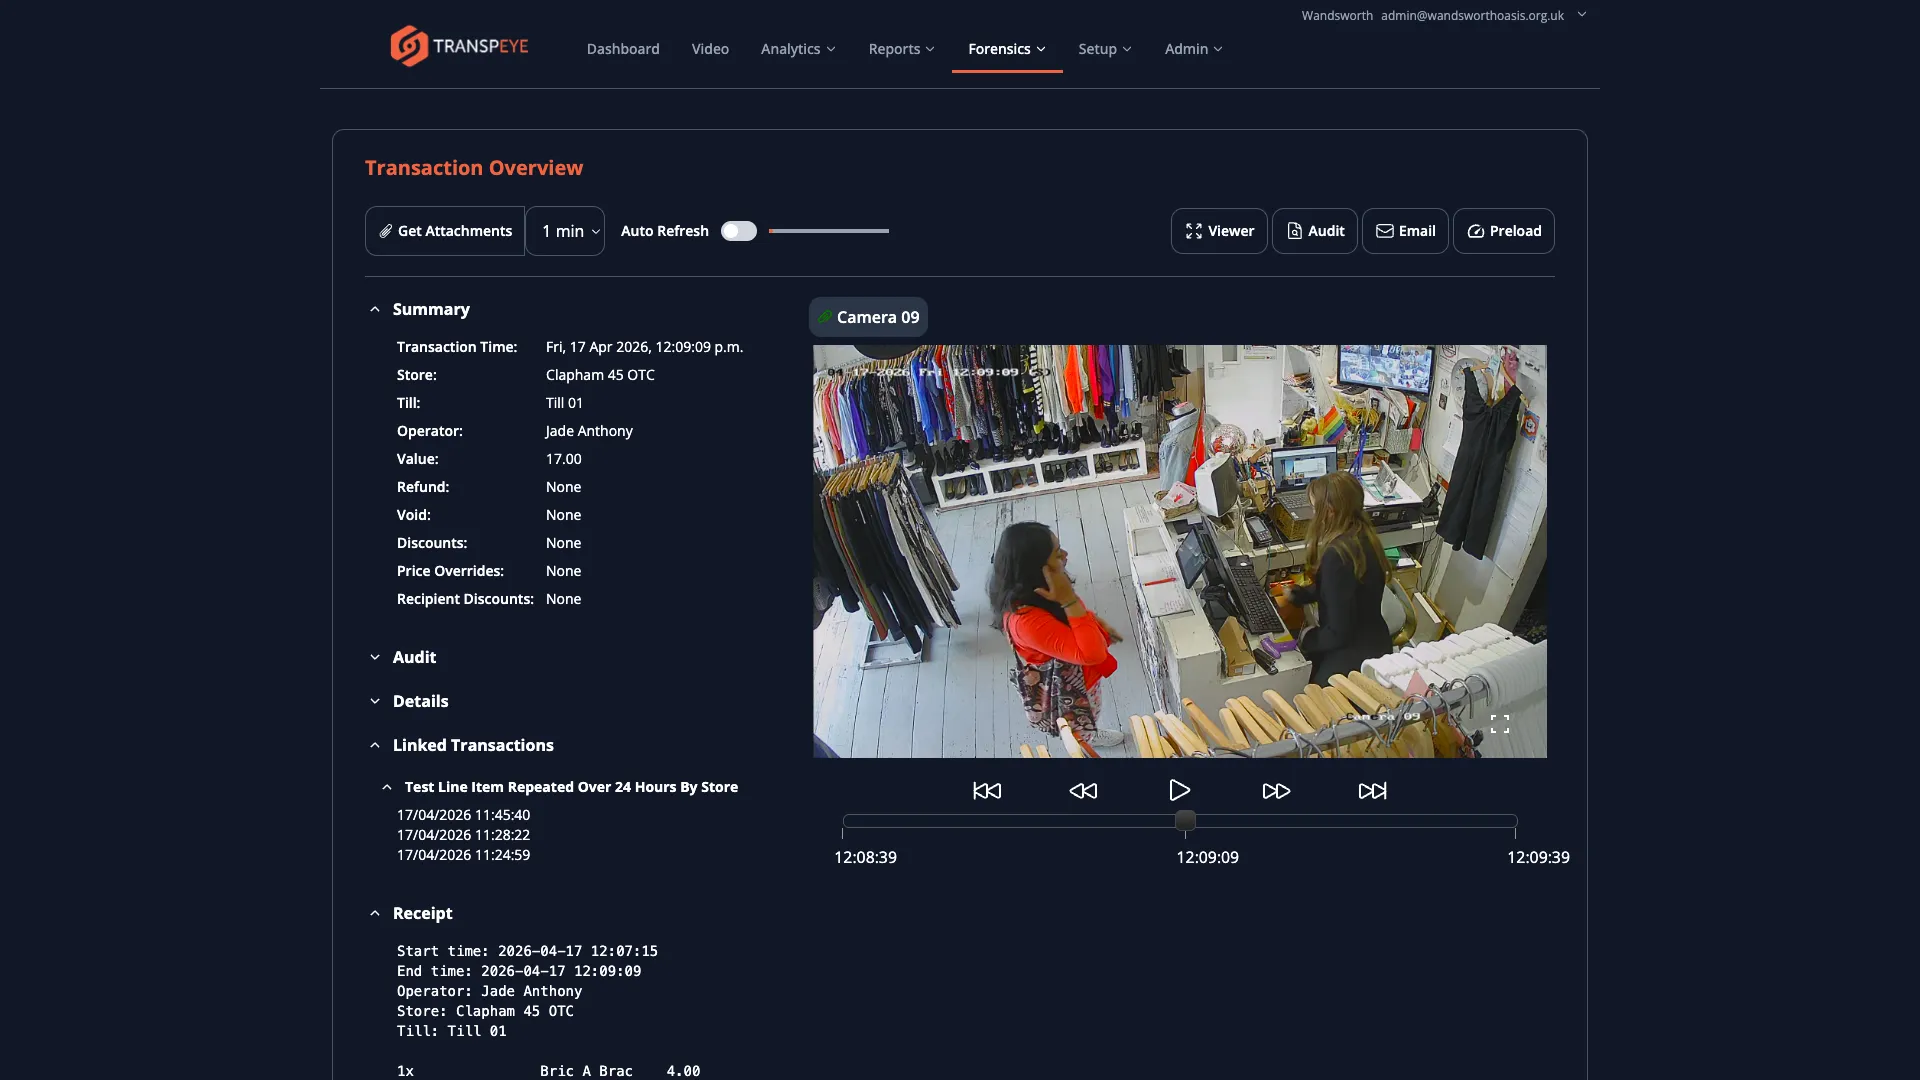
- Any attached screenshots or CCTV video clips
- The alert associated with the transaction, if one was triggered
- The full audit history, including any comments added by investigators
Use the detail view to build an evidence record for a specific transaction.
Step 6: Export Data to CSV
Section titled “Step 6: Export Data to CSV”If data export is enabled for your account, an “Export CSV” button appears above the table. Click it to download the currently filtered transaction data as a comma-separated values file. The export includes all columns visible in the table and respects your active filters. Use this for offline analysis or to share records with colleagues who do not have Transpeye access.
Step 7: Print the Transaction List
Section titled “Step 7: Print the Transaction List”Click “Print” to send the current table view to your printer or PDF writer. The print layout removes the navigation bar and filter panel, presenting only the data table for a clean printed record.
- Start with a narrow date range. Large date ranges across a busy estate can result in thousands of rows. Filter to a specific day or shift first, then widen as needed.
- Combine filters for precision. Use store and operator filters together with a value threshold to quickly isolate high-value transactions by a specific member of staff.
- Sort by Discount or Void. Sorting by the Discount or Void column in descending order quickly surfaces the largest exceptional amounts for review.
- The Has Attachment filter is useful for investigations. When a policy triggers a screenshot or CCTV capture, setting Has Attachment to Yes shows only the transactions where evidence was collected.
- Audit status indicates review progress. The Audit column shows whether a transaction has been reviewed and in what state. Transactions with no audit status have not yet been reviewed.
Troubleshooting
Section titled “Troubleshooting”| Problem | Solution |
|---|---|
| The table shows no results | Check that your date range is correct and that you are not over-filtering. Click “Reset Filters” to restore defaults. |
| The Export CSV button is not visible | Data export may be disabled for your account. Contact your administrator. |
| A transaction shows no line items in the detail view | Line item data may not have been received for that transaction. This can occur if the till agent was not configured to capture line items. |
| Columns appear out of order or are missing | The table adapts to your screen size. On smaller screens, some columns may be collapsed. Widen your browser window or scroll the table horizontally. |
| Clicking a row does not open the detail view | Check that you are clicking on the row itself rather than a link or button within it. Ensure your browser session has not expired. |